MM logo white 1
MM logo red
Image description is not available

Connecting a hob yourself

Luuk13 NOVEMBER 2025
A worker in blue gloves installs a black cooktop on a counter with tools nearby.

Whether it’s smart to install your new hob yourself mainly depends on the connections in your kitchen and your knowledge of electrics. In this article we explain the different connections used to install a hob and take you step by step through the installation process for various hobs.

How do you connect a hob yourself?

Hands arrange a black metal grate over a black gas stovetop with round burners and black knobs. A wood counter surrounds it.

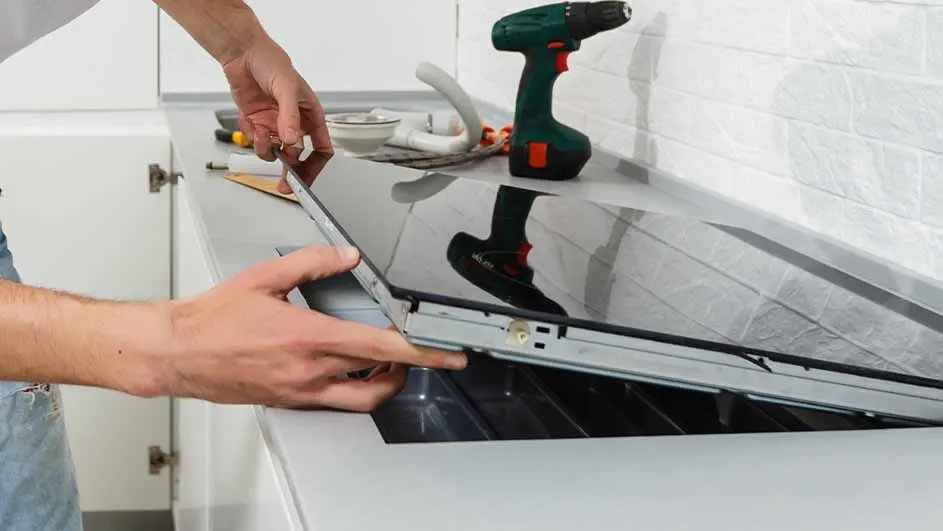
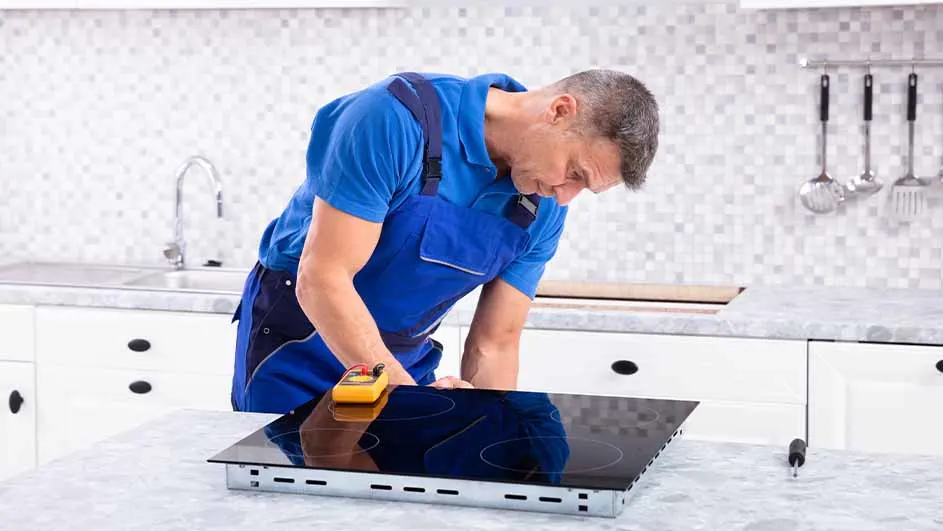
Only connect a hob yourself if you understand electrics. If you’re not familiar with this, we always recommend calling in a professional. For example, use MediaMarkt’s installation service. The type of connection in your kitchen and consumer unit has a big influence on the choice and correct installation of a hob. Most hobs are connected to a so‑called 5‑pin Perilex socket. This is a socket with 5 terminals. You need this connection if you want a hob with 4 or 5 burners/zones. Such hobs require a lot of power, often more than 3,680 watts. There are also hobs that you connect to a normal socket, also called a 2‑pin socket. These hobs deliver much less power (a maximum of 3,680 watts) than hobs that you connect to a 5‑pin Perilex socket.

Connecting different phase hobs

A person installs a black glass cooktop into a white countertop. A green and black drill sits nearby on a white tiled wall.

When connecting an electric hob, you’ll encounter 1‑, 2‑ or 3‑phase hobs. The phase determines into how many zones the power is distributed across your hob. The more phases, the more power a hob requires. To supply this power, each hob needs the correct socket and the correct circuit in your consumer unit. 1‑phase hobs distribute the power from a single phase across the hob. This requires less than 3,680 watts and can therefore be connected to a regular 2‑pin socket. There aren’t many 1‑phase built‑in hobs in the Netherlands. Most hobs have a 2‑phase or 3‑phase connection. For these you need a 5‑pin Perilex socket and the right circuits in your consumer unit. For a 2‑phase hob you need a so‑called “cooking group”. 90% of Dutch households have this. For a 3‑phase connection, three‑phase power is required. In most cases a new circuit must be added to your consumer unit. Always have this done by an electrician.

Connecting an electric hob

A person in blue workwear inspects a black stovetop with a yellow tool in a bright kitchen setting.

There are 2 types of electric hobs: induction and ceramic. Induction hobs heat pans directly via magnetic fields, providing fast and efficient heating. Ceramic hobs use electric heating elements beneath a glass surface. Most electric hobs require a lot of power and therefore need a Perilex socket and plug. Don’t have this in your kitchen yet? Ask a certified electrician to install it. Do you already have a Perilex connection in your kitchen and a consumer unit that provides the correct number of phases? Then you can follow the steps below to connect your electric hob.

More differences between induction and ceramic

Connecting an induction or ceramic hob

A white stove with a black cooktop showing four circular heating elements and a black oven with a horizontal silver handle.

If you’re certain you have the correct socket in your kitchen and your consumer unit is rated for the power of your new induction hob, follow this step‑by‑step plan to connect it:

  1. Connect the supply cable and plug to the hob.
  2. Apply sealing tape around your electric hob if it isn’t already fitted. This helps prevent short circuits if something boils over.
  3. Place the induction or ceramic hob neatly into the cut‑out in your worktop.
  4. Secure the hob. This is only necessary if special clamps are supplied. If not, the weight of the hob will keep it in place.
  5. Plug it into the socket.

Connecting a gas hob

Besides electric hobs, you can also choose a gas hob for your kitchen. You can generally install this yourself, but it’s important to be careful. A mistake when connecting a gas hob can be very dangerous. In doubt? Have MediaMarkt’s professionals install it for you. Confident to proceed? Follow this step‑by‑step plan:

A technician in a blue cap uses a wrench to repair a gas stove with a white tiled backsplash. They wear orange gloves.
  1. Make sure your gas hob is connected with a stainless‑steel (RVS) gas hose. This is mandatory.
  2. Close the gas tap properly. Find the gas tap in your kitchen and turn it a quarter turn. If the tap is perpendicular to the pipe, it’s closed.
  3. Make the connection between your gas hose and the hob with a comfort fitting (comfooraansluiting). First wrap a layer of special gas tape around the hob’s threaded connection and tighten the fitting securely.
  4. Attach your gas hose to the comfort fitting.
  5. Connect the gas hose to your gas tap. Check for leaks by brushing the connection points with soapy water and carefully opening the gas tap. Do no small bubbles appear? Then your gas hob is connected correctly.

Switching from gas or ceramic to induction

Our advice on connecting hobs

Gloved hands adjust a silver pipe under a black stovetop with a wrench. A yellow gas line is visible below the counter.

Connecting an electric hob is quite a tricky job because it requires considerable electrical knowledge and experience. The same actually applies to connecting a gas hob. We therefore always recommend using MediaMarkt’s service for these kinds of jobs. Going to do it yourself anyway? Make absolutely sure how many phases your hob requires and whether your socket and consumer unit can handle it.

Which hob will you choose?

These articles might be interesting for you